Layout: You enter a circular courtyard with the Emperor at its center and there are 5 ponds. There are 2 entrances to the courtyard.
Ponds orientation: We orientate us from the entrance using the left side portal (when you run up left from where you chose between Lu-Zhi or Keaira). The pounds are labelled 1 to 5, where pond 1 is at your left coming out though this door. Pond 2 to is to the right of pond 1 and ponds 3, 4, 5 counts counter clockwise from pond 2.
Emperor Fight
It is done in phases and the real health of the Emperor is only taken down when he is at the center. Between center phases he will spawn reflections in the ponds that we must take down for him to return to the center again. Only 1 reflection is the correct one.
Don´t go in dps a reflection before tanks got them as they do very high magic damage.
Golem tanks: 2 tanks with high physical mitigation + high hate (as dps must burn down golems fast to 75% it´s good aggro that counts).
Emperor tanks: Only protection needed as emperor casts different types of magic damage.
Phase 1: Burn the Emperor down to 80 % at the center. Only blade dance to worry about.
Phase 2: Two Emperor reflections spawn in pond 1 and pond 2. Burn down the correct one.
Phase 3: Emperor returns to the center and fight him from 80% down to 65%. He will now start casting mortal affliction and spawn Golems. The golems are pulled by golem tanks and no AoE dps before these tanks got them (for example ToS should not cast stormfield until the first golems have spawned and DT´s should not start any dread shadow before they are away).
Phase 4: Three emperor reflections spawn in pond 1 to pond 3. Burn down the correct one, and then repeat as reflections return to pond 1 and pond 2.
Phase 5: Emperor returns to the center and fight him from 65% down to 50% with attention to Blade, Golems and Mortal Affliction.
Phase 6: 4 emperor reflections spawn in pond 1 to pond 4. Burn down the correct one 3 rounds.
Phase 7: Emperor returns to the center and fight him from 50% down to 35% with attention to Blade, Golems and Mortal Affliction + Pact. In addition the Emperor will start to cast Pact that is a high damage floor dot on the 3 toons furthest away from the center. Therefore 3 toons are assigned to take care of pact and have to move at the outer walls until the dot is on the floor and can thereafter return to dps until getting ready for next pact. Pact is only cast when Emperor is at the center.
Phase 8: Five emperor reflections spawn in pond 1 to pond 5 Burn down the correct one (4 rounds).
Phase 9: Emperor returns to the center and fight him down with attention to Blade, Golems, Mortal Affliction and Pact.
Dread shadow: Excellent, but must never be up when Golems spawn or they may aggro lock Golems. If golems spawn and you have dread shadow up you have to kill dread asap.
Blade Dance: Repeated with a slow moving blade moving around Emperor, easy to avoid and you must avoid it as it gives a stun and a very high 5 minutes magic debuff. If a tank gets this debuff it´s basically not possible to take a hit from Emperor until it timed out. Any dps move away asap at Blade to not get tanks body blocked.
Emperor Reflections at ponds: Easy to spot as the fake ones show the “white aggro skull” when irritated or hit, the attackable one has no “white aggro skull” and all should leave other reflections to attack only this (if golems pop only tank team stay on reflection and the rest dps golems). The reflections take damage as mana loss and when mana is out they disappear.
Golems: Spawns close to Emperor and must be aggroed and pulled to dps team and burned down below 75% health or they explode possibly wiping the raid. Kite golems away when they are below 75%, same if you are a dps and gets aggro run away with them below 75%, but if they are above 75% you must stay around dps team (try staying alive running around golem tanks). Golems spawns with 60 sec timer from first Golems.
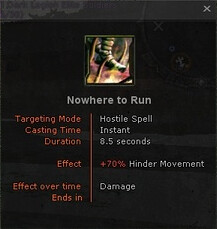
Careful as you can get movement debuff "Nowhere to Run" when kiting Golems.
Mortal Affliction: Cast on aggro holder and the 6 closest toons. This buff does high damage and all affected must stay close to each other until it times out or you will likely die. A blue circle appeasr at aggro holder where you must be to end this damage buff. This is cast repeatedly when Emperor is at the center.
IMPORTANT: If mortal affliction is cast just as reflections spawn, Emperor Tank team must stay and wait for the blue circle before going after the ponds.